People often pick up one of our pieces in the workshop, turn it over once, watch the sand begin to fall, and ask the same question.
How does this actually work?
It’s a fair question. From the outside, a moving sand picture looks like a simple object — a framed piece of glass with some colored sand and some liquid inside. But the more you look at it, the stranger it gets. Why does the sand fall so slowly? Why does it form patterns that look like landscapes — mountains, layers, sediment — instead of just settling in a heap? Why is each flow different? How does it not just turn into a muddy mess after a few flips?
The honest answer is that there’s more engineering inside a moving sand picture than most people realize. The thing looks simple. It is not simple.
This post is a tour through the actual design and construction of a moving sand picture, from the perspective of someone who builds them. I’ll cover the materials (glass, sand, liquid, frame), the design choices that determine how the piece behaves, and the manufacturing tolerances that separate a beautiful piece from a mediocre one.
The Layers of a Moving Sand Picture
Let’s start with what’s actually inside. A typical moving sand picture is a sandwich of:
- Front glass pane — what the viewer looks through
- A thin internal cavity — the space where the action happens
- Back glass pane — the rear surface
- A perimeter seal — keeping the liquid contained
- A frame — the structural exterior
Inside the cavity:
- Multiple grades of colored sand — the visible medium
- A viscous transparent liquid — usually a glycerin-water mix
- Air pocket(s) — critical to how the flow works
Each of these has design parameters that shape how the finished piece behaves. Get any of them wrong and the piece won’t work the way it should.
Let me walk through each one.
The Cavity Geometry
The first major design decision is the shape and dimensions of the internal cavity.
A moving sand picture’s cavity is typically very thin — a few millimeters between the front and back glass. The thinness is essential for two reasons. First, it controls how the sand behaves when falling: if the cavity were too thick, the sand would just clump and fall in a chaotic mass. The thin cavity forces the sand grains to flow in a quasi-2D layer, which is what produces the elegant patterns.
Second, the thin cavity makes the air pocket behave usefully. When the frame is flipped, the air pocket has to migrate from one side to the other through the sand-liquid mixture. The thin cavity ensures the air rises in a controllable, channeled way — pushing sand around and creating the characteristic flow patterns.
The cavity’s outline (the perimeter shape) also matters. A simple rectangular cavity produces relatively predictable flow. Some pieces use cavities with internal baffles, dividers, or shaped boundaries to produce specific flow effects — channel narrowing, intentional pooling, or directional cascades. The exterior shape of the cavity determines what kind of landscapes the piece tends to produce.
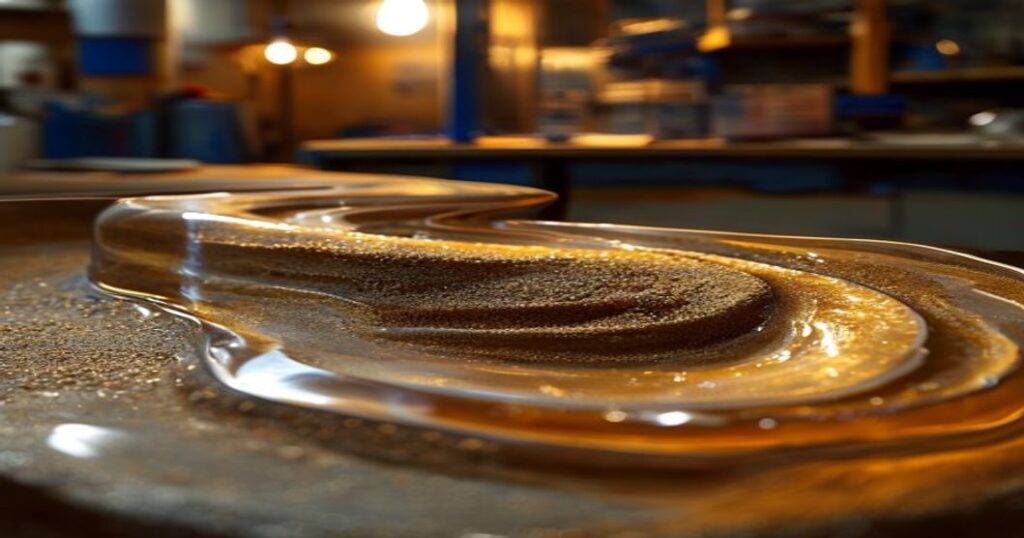
For our deep-sea sandscape, the cavity is rectangular with very specific aspect ratio — wider than tall — to encourage the layered horizontal sediment patterns that read as undersea landscape. A taller, narrower cavity would produce different effects (more like cliff faces or vertical strata).
The Glass
The glass panels look like simple plate glass. They are not.
Several specific properties matter:
Optical clarity. The glass has to be as clear as possible — typically a low-iron “ultra-clear” or “extra-clear” glass that lacks the slight greenish tint of standard window glass. Cheap pieces use standard glass and you can see the difference: there’s a green cast to the entire image that washes out the colors of the sand.
Surface flatness. The glass has to be very flat — any waviness produces refractive distortion that makes the sand appear to “ripple” as it moves. High-quality moving sand pictures use float glass with strict flatness tolerances.
Edge finish. Where the two glass panels meet the perimeter seal, the edges have to be ground smooth to prevent stress concentrations that could crack the glass over time. This is one of the production steps where cheap pieces cut corners.
Thickness. Too thin and the glass is fragile and the panels can flex (which messes up the cavity geometry); too thick and the piece becomes heavy and visually clunky. Most well-made pieces use 3-4mm glass.
Our pieces use low-iron glass with polished edges, sourced from a Chinese specialty glass supplier we’ve worked with for years.
The Liquid
The choice of internal liquid is one of the most important design decisions.
The liquid serves several functions simultaneously. It slows the sand’s fall (by viscous drag) so the flow happens at a watchable rate rather than instantly. It provides the visual backdrop. It transmits the air bubble from one side to the other when the piece is flipped. And it acts as a hydraulic medium that distributes pressure evenly.
The most common liquid used in moving sand pictures is a glycerin-water mixture in specific proportions, sometimes with additional additives. The glycerin gives the liquid its viscosity (thickness); the water tunes the viscosity to the precise level needed; minor additives can improve clarity, prevent microbial growth, and tune the surface tension.
The viscosity is critical. Too low (too watery) and the sand falls too fast — the piece settles in seconds and doesn’t have the contemplative slow-flow quality. Too high (too thick) and the sand barely moves at all, or the air bubble can’t migrate properly when the piece is flipped.
The exact proportions are something most makers consider proprietary. Different makers’ pieces have noticeably different flow rates, and the difference comes down largely to liquid formulation.
The liquid must also be:
– Transparent. No yellowing, cloudiness, or color over time.
– Chemically stable. Doesn’t degrade, react with the sand, or react with the seal.
– Non-microbial-growth-supporting. A bit of antifungal additive is needed to prevent slow biological growth over decades.
– Non-toxic. In case the seal ever fails (rare), the liquid is contained and not harmful.
For our pieces, we use a glycerin-water mixture tuned over years of testing for a specific flow rate that gives roughly 3-4 minutes of active flow before the landscape settles.
The Sand
I’ve written elsewhere about how colored sand is made; here I’ll focus on the specific requirements for moving-sand-picture sand.
The sand has to satisfy a demanding set of requirements simultaneously:
Tightly graded grain size. All grains in a single color must be very close in size. If grain sizes vary, larger grains fall faster than smaller ones, and the colors separate during flow. The sand we use is sieved to a narrow size band (typically a 200-500 micron range, depending on the desired flow rate).
Rounded grain shape. Angular grains tumble unpredictably and produce less elegant flow. The sand is either selected from naturally rounded sources or tumbled to round the edges.
Density-matched colors. This is the subtle one. Different colored sands often have slightly different densities (because they use different pigments). If color A is denser than color B, color A always settles first, and the piece always produces the same predictable layering pattern. Density-matched colors interleave more richly during flow, producing more variation between flips.
Pigment permanence. As discussed in the colored-sand post, the sand must use fired inorganic pigments that don’t leach into the liquid. Cheap resin-coated sand will slowly leach color into the glycerin and ruin the piece.
Color choice. This is artistic, not engineering, but it matters. Three or four colors is the typical range — too few colors and the patterns are visually flat, too many and they muddy together. The colors are chosen to be landscape-coherent — palettes that, when interleaved by the flow, look like geological or oceanic features rather than random marbling.
For our deep-sea sandscape, we use three colors: a warm amber, a deep oceanic blue, and a clean white. These three were chosen, after extensive testing, because they produce flows that consistently read as undersea sediment — the amber suggests sand and bottom, the blue suggests deeper water and shadow, and the white suggests highlights and bone-pale stratification.
The Air Pocket
The air pocket inside the cavity is the most counterintuitive design element — and one of the most important.
When the frame is flipped, the air pocket has to migrate from the (now bottom) to the (now top) of the cavity, passing through the sand-liquid mixture. As it does, it pushes sand up and around, creating the cascading flow that we watch. The dynamics of the air bubble’s migration are responsible for most of what makes moving sand pictures fascinating.
The size of the air pocket matters enormously. Too small and the bubble can get trapped in the sand without producing meaningful flow. Too large and the air dominates the cavity and the flow is too brief or too dramatic. The right size is something most makers tune empirically — a few percent of the total cavity volume, depending on cavity geometry.
Some pieces have a single air pocket; some have multiple smaller ones to produce more complex flow patterns. Some are designed so that the air pocket can split or merge during flow, producing layered cascades.
This is one of the most undertheorized aspects of moving-sand-picture design. The deep relationship between air pocket size, cavity geometry, sand grain dynamics, and liquid viscosity is genuinely subtle. Two pieces that look superficially similar can flow completely differently because their air pocket dynamics are tuned differently.
The Seal
The perimeter seal is what keeps the liquid in the cavity and the air out. It’s also the most common point of failure in cheap pieces.
A good seal must:
- Be impermeable to glycerin (some seals are not — they slowly leach the liquid out over years).
- Bond strongly to the glass surfaces.
- Resist temperature variation (the cavity expands and contracts slightly with temperature; the seal has to flex without cracking or leaking).
- Last for decades.
The sealants used vary by maker. Common choices include silicone-based sealants (good flexibility, decent durability), epoxy-based sealants (very strong, less flexible), and specialty industrial adhesives.
The application of the seal is its own production challenge — it has to be even, free of voids, and properly cured. Cheap pieces often have visibly uneven seals or air bubbles in the seal that telegraph future failure.
For our pieces, we use an industrial-grade silicone-epoxy hybrid sealant, applied in a controlled-curing process, which we’ve tested at decade-equivalent stress conditions.
The Frame
The frame is the visible exterior — wood, metal, or composite — that holds the glass-and-cavity assembly. It serves both structural and aesthetic functions.
Structurally, the frame has to support the cavity assembly, protect the edges of the glass from impact, and provide a stable resting surface (so the piece sits at the correct angle for flow when placed on a shelf or surface).
Aesthetically, the frame establishes the piece’s design character. A simple natural-wood frame produces a different overall feel than a sleek black metal frame or a vintage gilt-style frame. The frame is, in some ways, the only design choice that’s purely visual; everything else is engineering with aesthetic consequences.
For our deep-sea sandscape, we use a clean natural-finished wooden frame with rounded corners, designed to work in both modern and traditional interior contexts.
Assembly
Bringing the components together is its own process.
A typical assembly sequence:
- The two glass panels are cleaned (this matters more than people realize — any contamination on the inside surface will be visible forever).
- The cavity-defining spacer is placed between them.
- The sand and liquid are pre-measured and mixed in the right proportions.
- The cavity is partially sealed, leaving a fill port.
- The sand-liquid mixture is filled through the port, with care to not introduce air bubbles in the wrong places.
- The intentional air pocket is established at a precise volume.
- The fill port is sealed.
- The completed assembly is mounted in the frame.
- Quality control: each piece is flipped multiple times and inspected for flow behavior, leaks, and any visible defects.
A typical piece in our workshop takes roughly 90-120 minutes of skilled labor across the assembly steps. The materials cost is significant — high-quality sand and glass are expensive — but the labor is the larger share.
Why Cheap Pieces Are Cheap
The market has both excellent and very poor moving sand pictures. The differences are visible if you know what to look for.
Cheap glass — standard window glass with a green tint and visible flatness imperfections.
Cheap sand — wide grain size variation, opaque grains, density-mismatched colors, and visible color leaching after a few flips.
Cheap liquid — too watery (sand falls in seconds) or yellowing visibly within a year.
Cheap seals — visible bubbles, uneven application, eventually leaking.
No air pocket tuning — pieces that produce the same flow every time, or that have flow that’s either too fast or too slow.
Plastic frames — visibly cheap-looking, often warping over time.
The price difference between a $25 craft-store moving sand picture and a $150-300 professionally-made one looks large, but the quality difference is even larger. The cheap piece looks similar in a photograph; in person, every aspect feels less considered.
What This Means For The Owner
If you own a moving sand picture, a few practical implications:
-
Display it on a stable, level surface. The piece should rest at the correct angle (usually slightly tilted forward) for flows to work properly.
-
Avoid extreme temperatures. Don’t display it in direct hot sunlight or near a heater. The seal and the liquid both have temperature limits.
-
Flip slowly. Quick flips can introduce trapped air or jar the cavity dynamics. A slow, deliberate flip produces the best flows.
-
Each flow takes its time. Don’t expect instant gratification. The flow is the point. Watch.
-
It will outlast most of your decor. A well-made piece, treated reasonably, will work for decades. Some Klaus Bösch pieces from the 1980s still flow beautifully today.
The Quiet Engineering
Here’s what I find satisfying about this craft.
Moving sand pictures look simple. They are, in fact, one of the more carefully engineered objects you’re likely to have in your home. Every aspect — glass, sand, liquid, air, seal, cavity, frame — has to be tuned correctly for the piece to do what it does. The result, when it works, is something that looks effortless. The appearance of effortlessness is the engineering achievement.
This is, in a way, what good craftsmanship always does. It hides itself. The viewer sees the beautiful sand falling and thinks: how peaceful. They don’t think: what a careful set of decisions about glass tolerance, grain size distribution, liquid viscosity, and air pocket volume. The complexity disappears into the experience.
Which is, of course, exactly what we want.
Vee Sharma is the founder of Moving Sandscape. The studio’s deep-sea sandscape is a small contemporary chapter in two long traditions — sand art and kinetic sculpture — and the kind of object I designed to live well in real homes.